工具/原料
-
CentOS 7.6
-
Vmware workstation
-
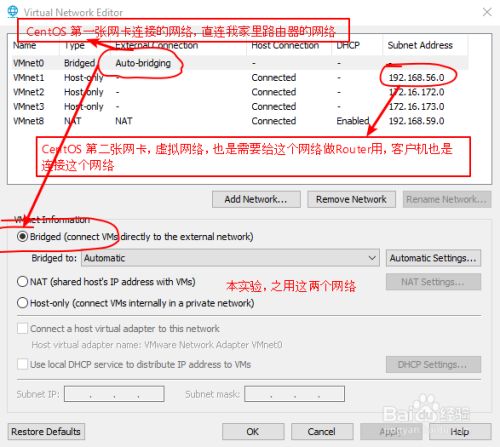
两个虚拟网络
方法/步骤
-
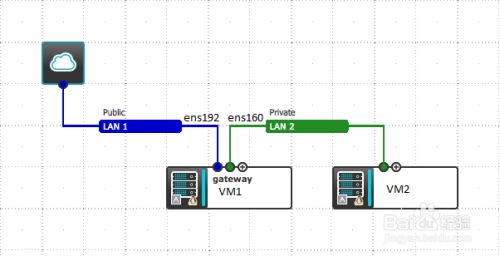
1. CentOS6.7 VM 添加两张虚拟网卡,一张直接连家里的网络 (Bridge)
另外一张连接 HostOnly独立网络
-
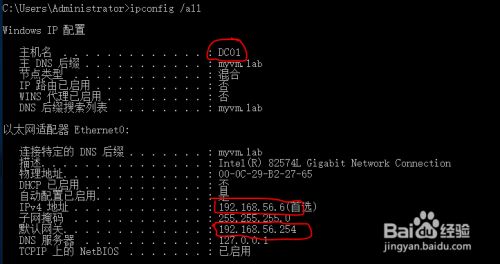
2. 在HostOnly 网络中创建一个主机。
我这里是其他实验的主机,既是DC,又是DNS。
-
启用数据转发:
编辑/etc/sysctl.conf 或者/etc/sysctl.d/99-sysctl.conf
添加如下内容
net.ipv4.ip_forward = 1
然后执行如下命令,如下输出结果,说明启用了转发。
[root@gw ~]# sysctl -p
net.ipv4.ip_forward = 1
-
我们只用firewall-cmd 两个zone, 一个是internal, 一个是external.
我的ens33 接的家里的网络,ens37接的hostonly网络, 这个网卡的地址,要陪在 hostonly网络中的客户机上,作为网关
1.把外网接口加到external zone中
[root@gw ~]# f irewall-cmd –permanent –zone=external –change-interface=ens33
success
#查看external zone中的配置, 确保接口已经加进来了。
[root@gw ~]# firewall-cmd –zone=external –list-all
external (active)
target: default
icmp-block-inversion: no
interfaces: ens33
sources:
services: ssh
ports:
protocols:
masquerade: yes #external zone 自动开了 MASQUERADE
forward-ports:
source-ports:
icmp-blocks:
rich rules:
2.把内网接口加到internal zone中
[root@gw ~]#
[root@gw ~]# firewall-cmd –permanent –zone=internal –change-interface=ens37
success
[root@gw ~]# firewall-cmd –zone=internal –list-all
internal (active)
target: default
icmp-block-inversion: no
interfaces: ens37
sources:
services: ssh mdns samba-client dhcpv6-client
ports:
protocols:
masquerade: no
forward-ports:
source-ports:
icmp-blocks:
rich rules:
-
重新加载配置文件,配置生效。
[root@gw ~]# firewall-cmd –complete-reload
success
-
测试:
客户机上配置 Centos Internal网卡地址作为网关,既可以与外面通信。
-
命令总结:
[root@gw ~]# echo “net.ipv4.ip_forward = 1” >> /etc/sysctl.conf
[root@gw ~]# sysctl -p
[root@gw ~]# firewall-cmd –permanent –zone=external –change-interface=ens33
[root@gw ~]#firewall-cmd –permanent –zone=internal –change-interface=ens37
[root@gw ~]#firewall-cmd –complete-reload
END
注意事项
-
开启转发功能
-
区分内外用的网卡,不要搞错
-
配置centos 内网网卡为 其他客户端的网关
-
测试过程中 DNS可以设置成外网的DNS,比如114.114.114.114


